Discover our new export system and customize your reports!
We just revamped our export system and it is now easier than ever to export all your data from AppTweak. You won’t need to go on all the different app pages to get a full report anymore. Discover the new process and export only what you need.
Export all your data in a couple of clicks
Select your Apps
Before this revamp, if you wanted to get your data from multiple apps you were following, you had to go on each app page and export the full report. A time-consuming task when you need data from the same app but in 5 different countries. Moreover, the download of a full report is sometimes heavy and unnecessary when you are only interested in a specific set of data.

With our new system, you just have to click on the button “New export” in your dashboard and see this pop-up appear:
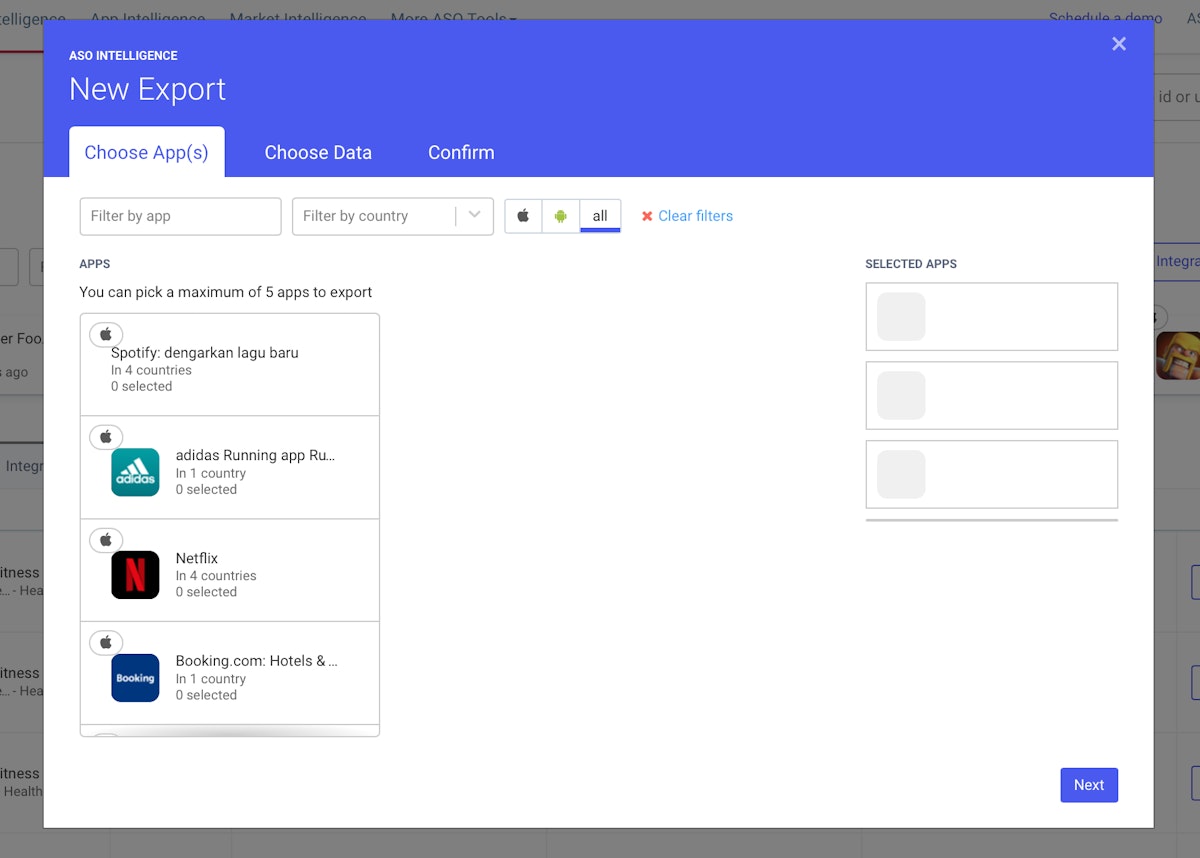
As you can see, it allows you to quickly scan through all your followed apps and pick only the countries you are interested in.
We decided to limit the number of apps you can select to 5 for performance reasons. This way, you will be sure to quickly have all you data.
Select your Data
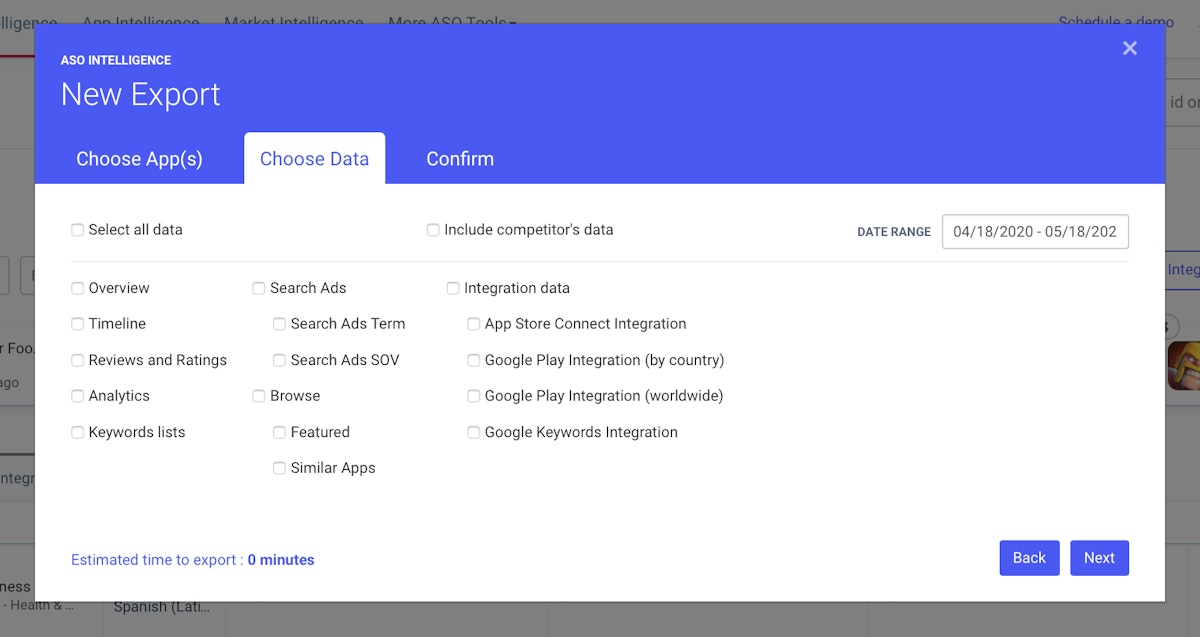
Once you are done with this selection, you can choose the data sets you wish to export. This step allows you to customize your exports by only selecting the sections you want. You can also decide to include the data of the apps’ competitors by ticking the “include competitor’s data” box.
in order to give you an indication of how long the export will take, we show you the “Estimated time to export”. However, it is a broad estimation and your export may take less time to be ready.
Confirm and launch
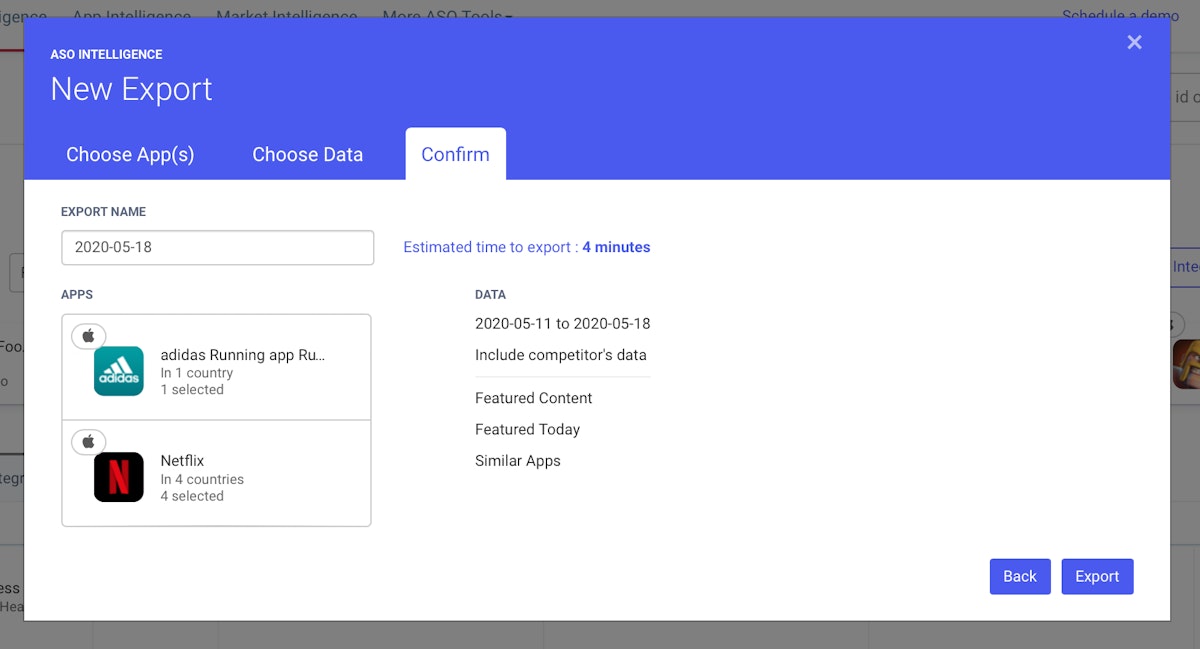
The last step sums up the data you wish to export with the possibility of naming the document in order to better organize your files.
You will then be redirected on the export interface page where all you requested exports will be saved.

The Export interface gathers all the previous exports you have requested. You can also generate new exports from this interface by clicking on “New Export” which will open the same pop-up as the one in the dashboard.
You can redownload previous exports and above all, you can refresh previously exported documents by clicking on “Export another date range”. No need to select your data again if you only want to have an update on the previous month. This function allows you to pick another date range for the same set of data. A new export with the updated date range will be exported.

If you only wish to export data from one app in particular in a specific country, you can still do it from the app page. The process is almost the same except that you will directly pick the data you wish to export from this app.

Export File structure
The export files are structured as follows:
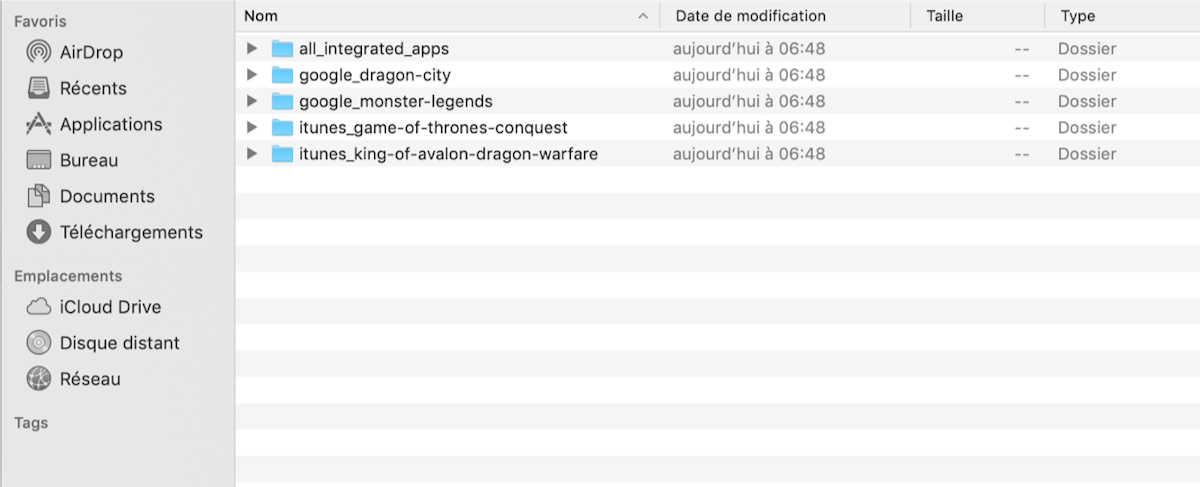
There is one folder per App ID and one folder that regroups all the data from the Apple and Google Console integrations.
Inside each App ID folder, you have a folder per country – language which contains all the CSV (Comma Separated Values) files you selected.
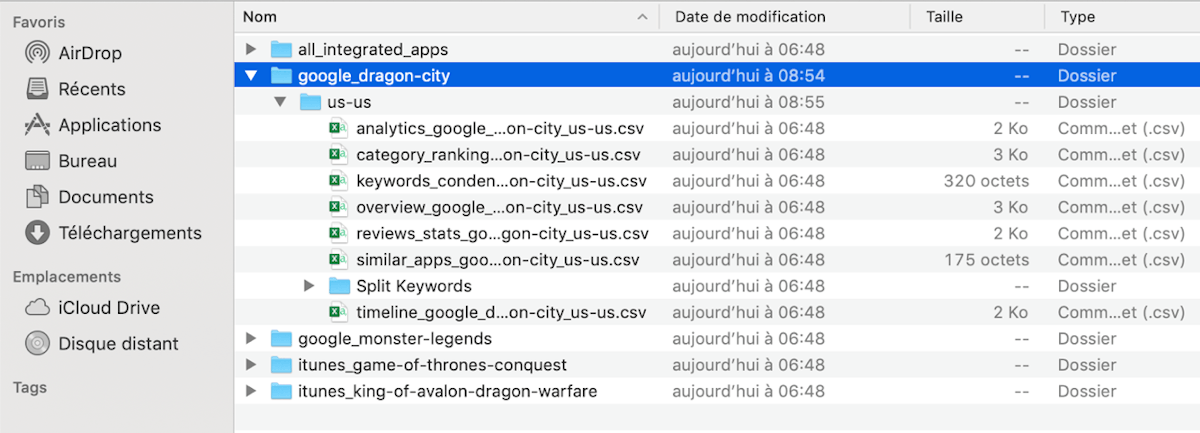
Regarding Keywords exports, you will have access to a condensed version regrouping all the data from keywords and a split version, separating Keyword stats (including indicators such as difficulty, chance, KEI), Keyword volumes and keyword rankings history.
Finally, in the integration folder, you will find a CSV file per integration type

How to change CSVs into understandable Excel files
If you are not familiar with CSV files, you can find yourself overwhelmed with an unreadable content instead of the data you asked.
We will give you the following steps in order for you transform correctly your data in an Excel sheet.
First, you need to select the first column of your excel sheet.
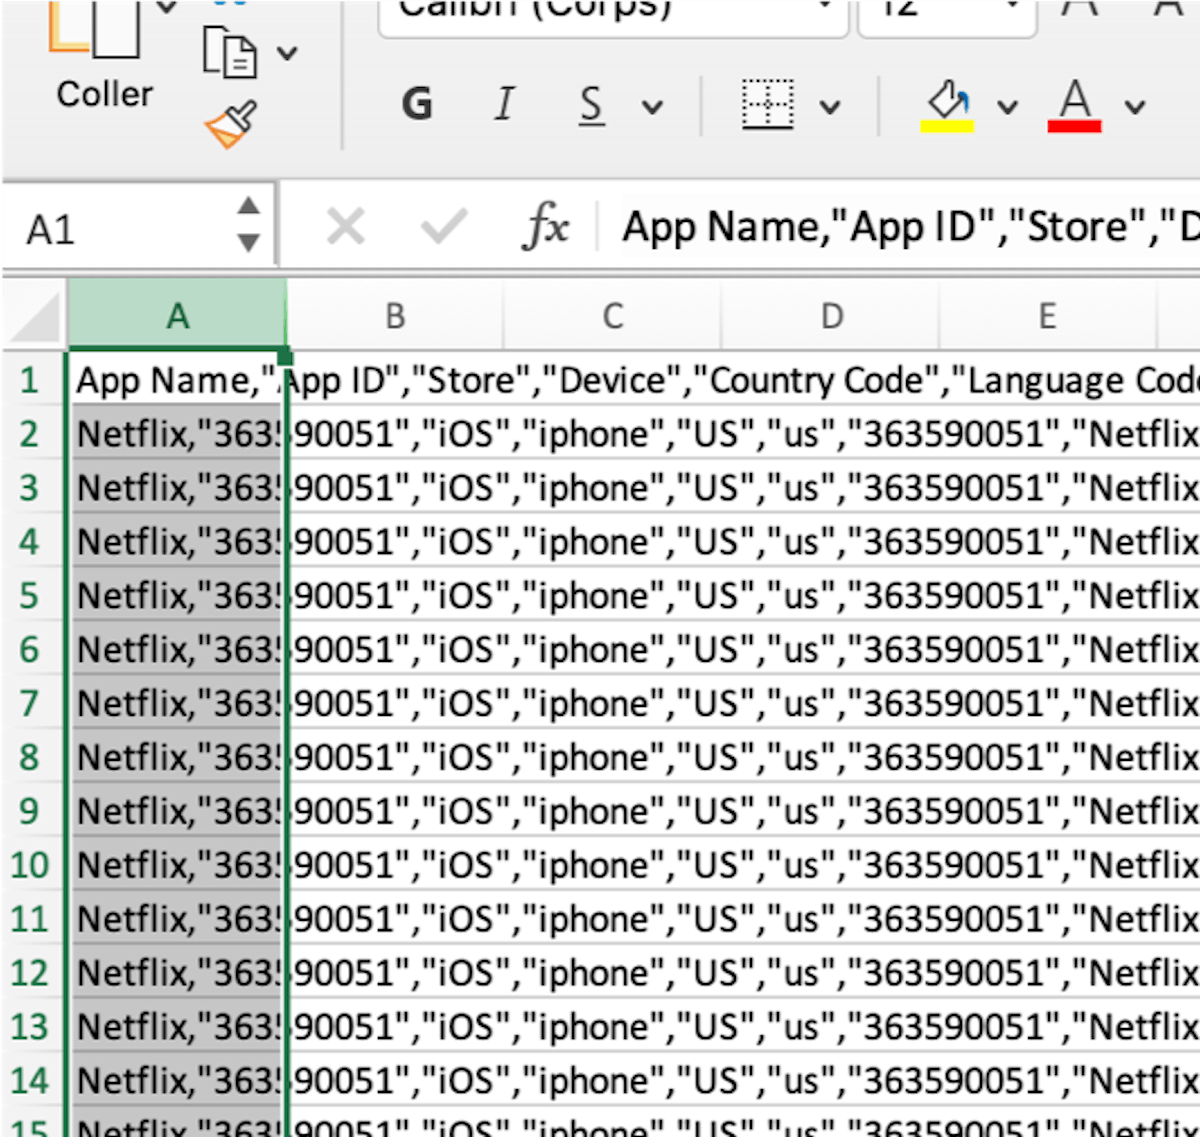
Then, you have to go to the “data” section in Excel and click on “Text to Columns”

This will open the following pop-up in which you simply have to select the option “Delimited” which will allow Excel to understand that you want a special character as a separator of each field
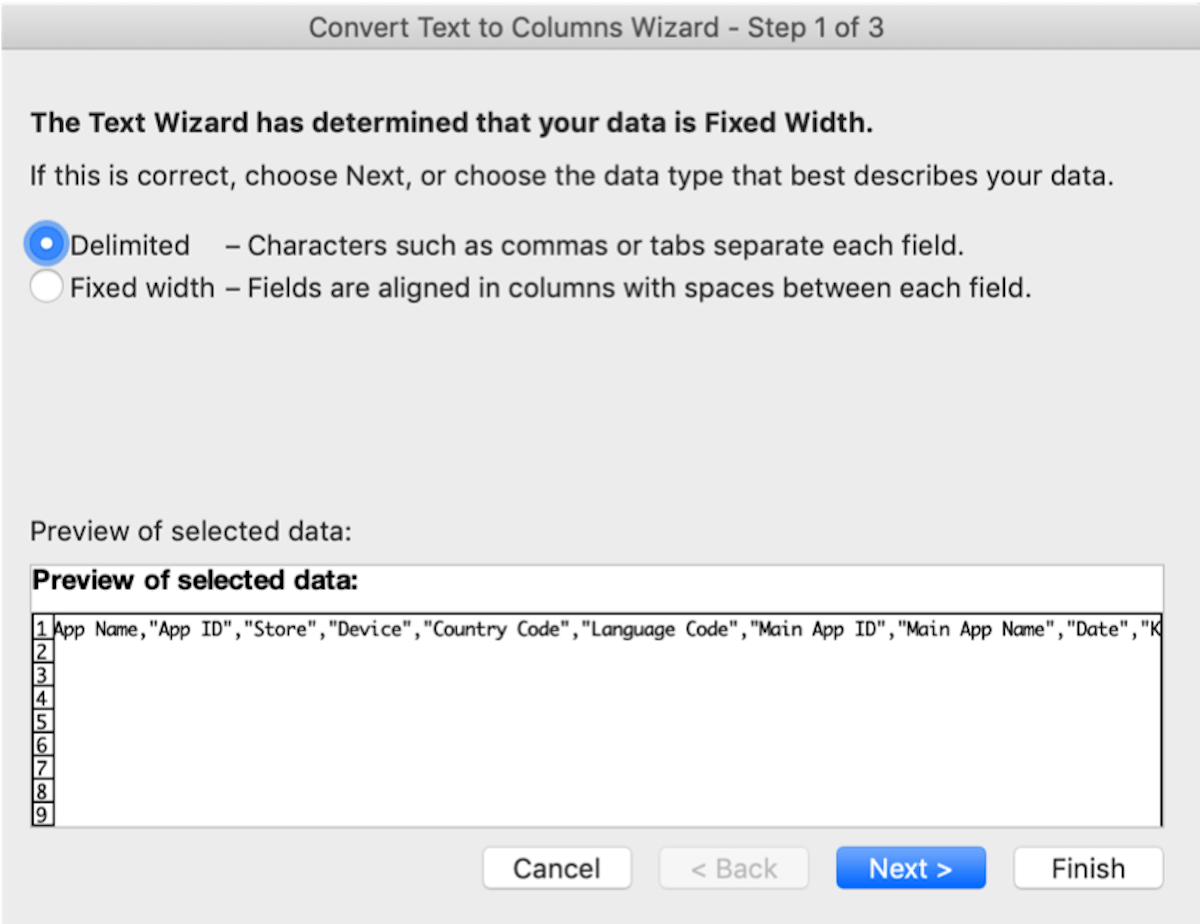
Once it’s done, the next step is to indicate that you want commas to separate each field
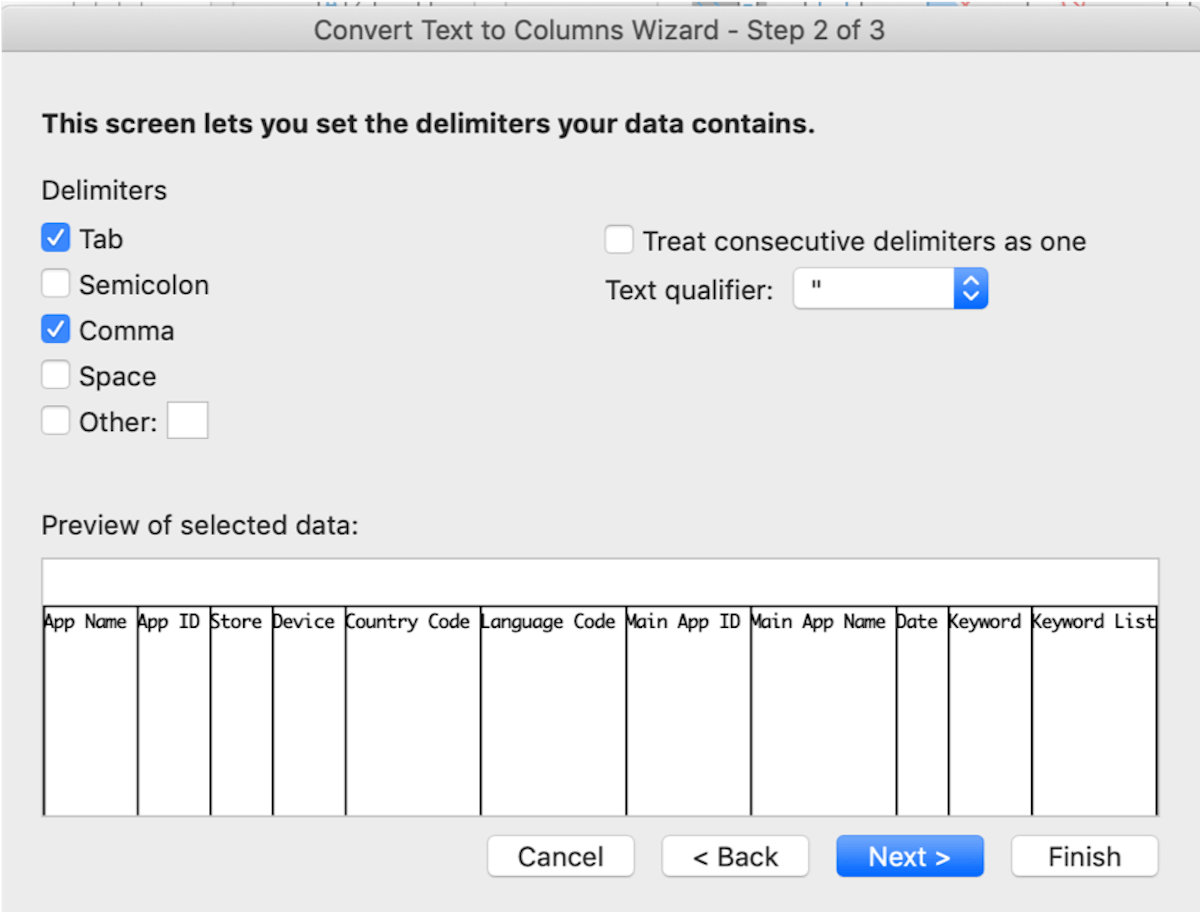
After you have clicked on “Finish” you will see the data shown correctly with different information in each column.
Start Exporting
We hope you will like this new system where you can customize your exports as you wish. It will reduce the time you need to get your data and you won’t need to go through the entire process an unnecessary number of times.
To sum-up, you can access to the exports via:
- The Dashboard
- The App Page
- The Export History interface
Try them out now and see how easy it became!


 Georgia Shepherd


 Olivier Verdin

 Jonathan Frisch

